Spays and Neuters for Days - Part 2: The Surgical Process
- Gianna Scala

- Jan 1, 2020
- 4 min read
Updated: Jan 14, 2020
Interning at the Southampton Animal Shelter: Observing Spays and Neuters - October 26th, November 25th, and November 26th
During my time at the Southampton Animal Shelter I not only learned the complete surgical preparation process, but I also learned the entire surgical process for spays and neuters on both dogs and cats. Dr. Mirante walked me through the entire process for both procedures on these animals as she was performing them. The first spay I witnessed was on a female kitten.
Spay: Canine and Feline
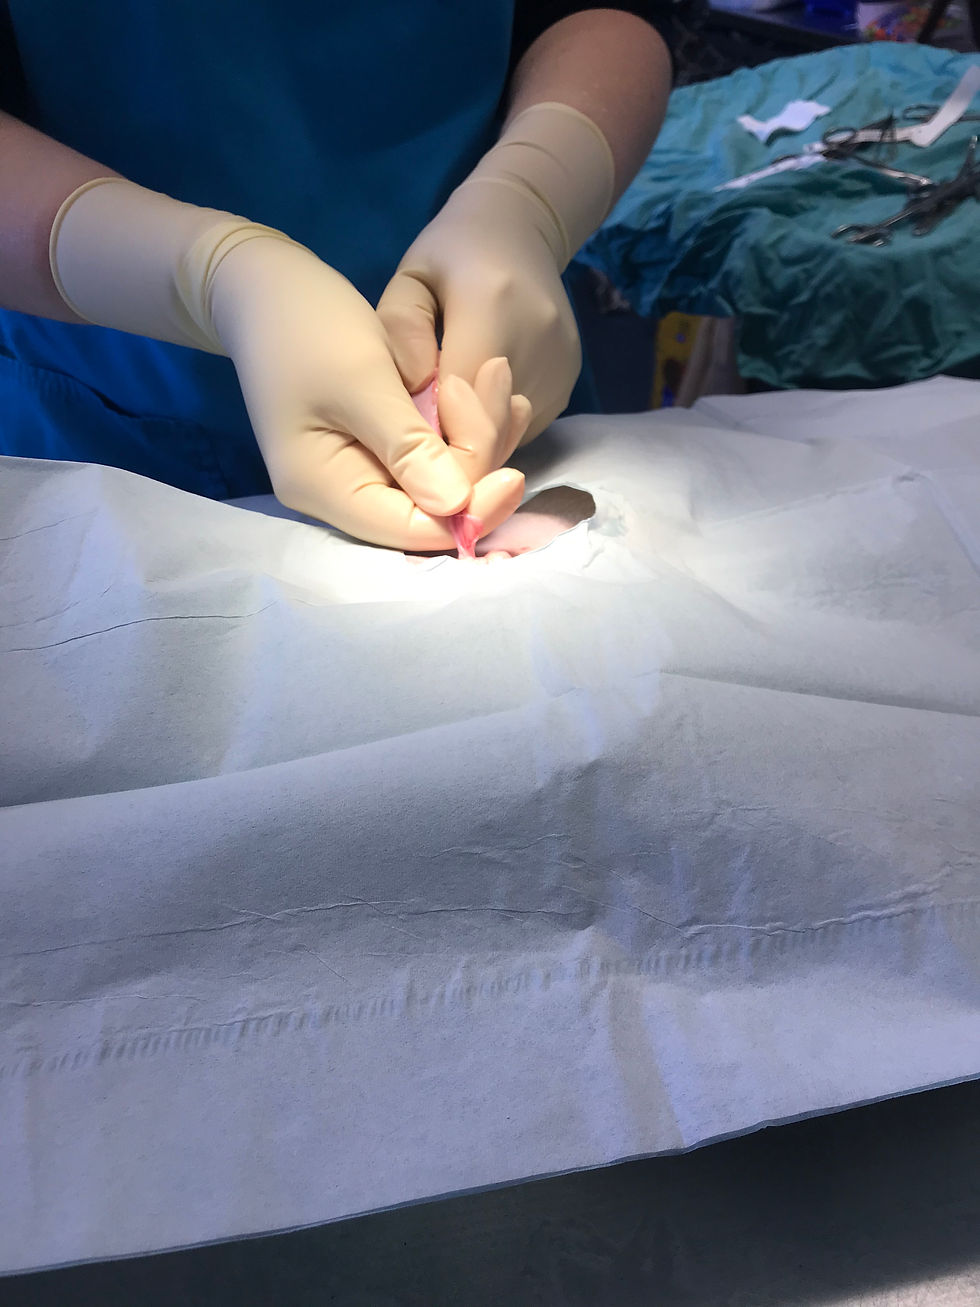
The first step in the spaying process was making a small incision using a scalpel directly below the navel (about the length of an inch) through the epidermis (the first layer of the animals skin). Once that incision was made, Dr. Mirante made her next incision through the linea alba which is the last layer of skin (which runs down the abdomen of the animal). The skin needs to be lacerated in order for the doctor to have access to the patient's organs. Once Dr. Mirante made her complete incision, she used the surgical tool known as a spay hook to search for the horns of the uterus. Once Dr. Mirante successfully found a uterine horn, she used her hands to pull out the rest of the horn; she then tore the suspensory ligament, and laid the ovary and uterine horn onto the patient's stomach in order to expose its entirety.

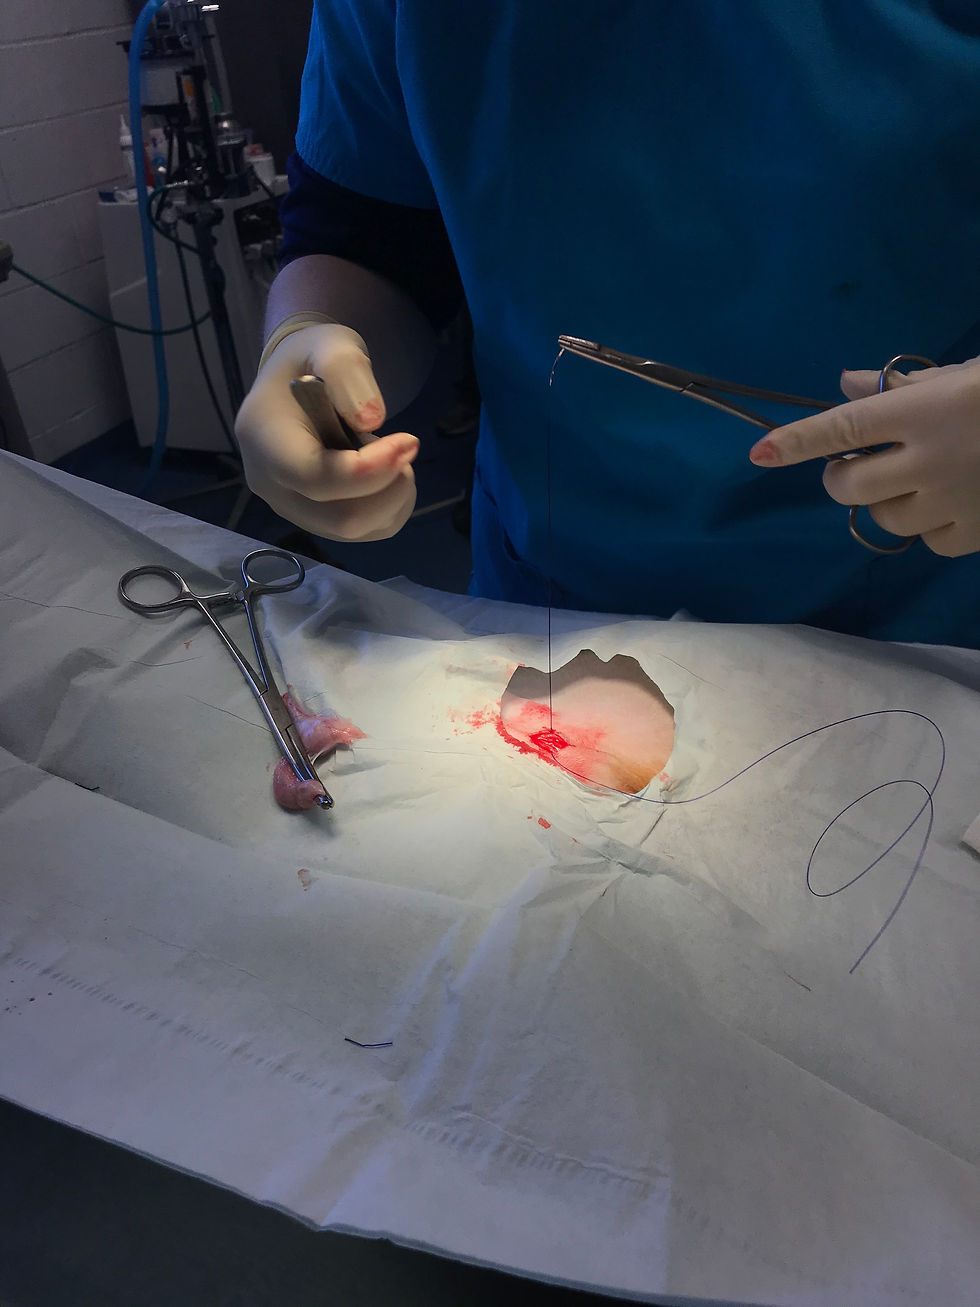
Once Dr. Mirante successfully found a uterine horn with the ovary, she began to pull it out so that the ovary was completely exposed. Dr. Mirante then removed a thin membrane that runs along the uterine horn. Once she had clear access to the ovary and the uterine horn, she took the ovarian blood vessels, clamped them in order to cause the blood vessels to become thinner, and then ligated them with a suture in order to prevent internal bleeding and hemorrhaging when the uterine horn and ovary were removed. She then cut through the ovarian pedicle, directly above the suture and beneath the ovary, in order to prevent bleeding when the horn and ovary were removed. Once the pedicle was cut, Dr. Mirante stretched out the uterine horn and ovary, (the two are connected) using the attached clamps, and pulled the ovary toward the tail until the the horn was fully revealed. This process was then repeated with the other ovary and uterine horn, and after this step was complete the uterine body was exposed. After the uterine body had been clamped and exposed, a ligature was then placed above it (can be done twice for additional precaution), preventing bacteria from entering into the abdomen through the incision made to remove the uterus.

Once the ligatures were completely in placed above the clamp, the doctor then transected the uterine body cutting below the clamp, allowing the full removal of the uterus. Once the uterine body was completely resected, the doctor took off the clamp and placed the cervix back into the patient's body. The last step was suturing the incision. The doctor started first by completely suturing the incision made to the linea alba. Once the linea alba was fully closed, Dr. Mirante then sutured the incision made to the epidermis, sealing the incision entirely. When the incision was closed entirely and the surgical area was cleaned, then the surgery was complete.


Neuter: Feline
While I was working at the Southampton Animal Shelter my mentor Dr. Mirante also walked me through the surgical procedure of a neuter. After the animal was prepped and ready for surgery the doctor first made an incision using a scalpel on the scrotal skin directly above each testicle. Next Dr. Mirante squeezed the scrotal sac where one incision was made, causing the testicle to come out. Dr. Mirante then pulled the testicle out separating it from the ductus deferens, revealing the blood vessels attached, and once they were revealed she ligated the blood vessels with the ductus deferens cutting off the blood supply to the testicles. Lastly, Dr. Mirante removed the testicle resecting it directly above the ligation of the blood vessels and ductus deferens. The doctor then did this same procedure with the other testicle. After both testicles were removed, the incisions were not sutured closed; the incision made on the scrotal skin and subcutaneous fat layers will close on its own with minimal to no bleeding, ending the surgery.
Neuter: Canine
After the animal was prepped for surgery, the doctor made an incision using a scalpel directly in front of the scrotal sac, and then pushed one of the testicles out of the scrotal sac through the incision. There is a thin membrane surrounding the testes known as the tunica vaginalis which is removed when the testicle is being pulled out of the scrotal sac. Once the testicle was completely exposed along with the blood vessels and the ductus deferens, Dr. Mirante then ligated both the testicular blood vessels and the ductus deferens with sutures. Once the suture was secured, the testicle was resected and removed, and then this process was repeated with the other testicle. After both testicles were removed, the incision made in front of the scrotal sac was then sutured closed, ending the surgery.

Interning at the Southampton Animal Shelter taught me not only how these procedures are done but also why they are so important. These two procedures are extremely important surgeries in the canine and feline world because they address the over population problem of dogs and cats.These surgeries also help prevent many cancers and malignant tumors that affect animals' reproductive systems.


Comments